I finished this one a while ago, and it’s slowly become my all-time favourite shirt!
I got this from the Salvation Army store for $5. It’s a size 16, but the fabric and pattern were so nice that I couldn’t leave it. I’ve been reading Merrick’s blog and the Refashionista’s adventures (highly recommended!) for a while now, so I felt up to the challenge of resizing it to fit me.
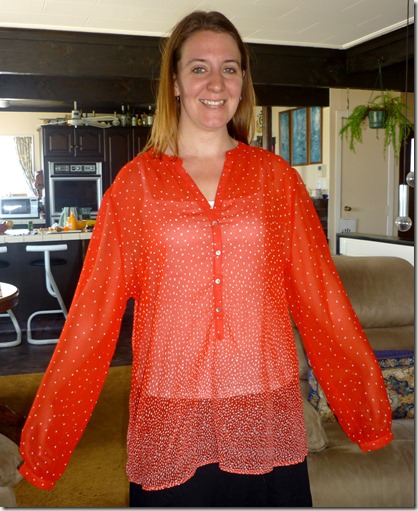
Here’s how we started:
You can see that it’s just a little too big on me! The top of the shoulders hangs well off my shoulders, the base of the arm hole is nearly at my waist, and you can’t even see my hands because the sleeves are so long! What you can’t see is that there is also lots of extra width.
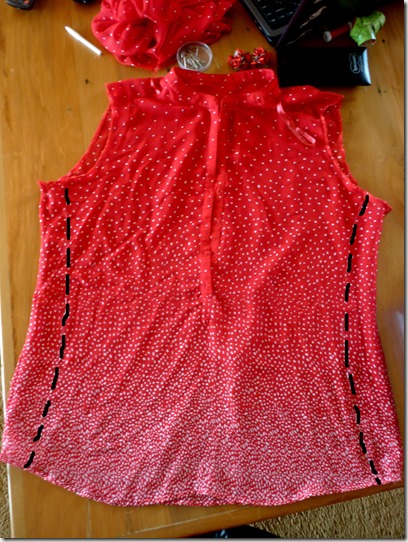
The first thing I did was cut off the sleeves along the seams. I then tried it on again inside out and pinned several places down the sides where I wanted to take it in, then stitched down that line and cut off the excess.
Then came the monster challenge of the sleeves. I’ve never done ANYTHING like this before, but I’ve read a lot of tutorials over time about how it should be done, so I had a general idea. Unfortunately I didn’t take any photos of what I did, I think I was concentrating too intensely! First I cut down the armholes so they would fit closer to my armpit than my waist, and at the same time cut the shoulders back to my actual shoulders. I also knew that I wanted the sleeves to be shorter, rather than full length, so I tried them on my arms, measured about where I wanted them, and cut them down in the same shape to match the armhole. To sew it to the body I placed the sleeves right-way-in inside the body of the top which was inside out (so the right sides were together), and stitched the seam. (Full disclosure – I had to unpick the first one and do it again, because I attached the wrong arm to the wrong side!!) There is a little bit of puckering where I could have sewn it better, but I’m the only one that would ever notice, and its really not that bad for my first go!
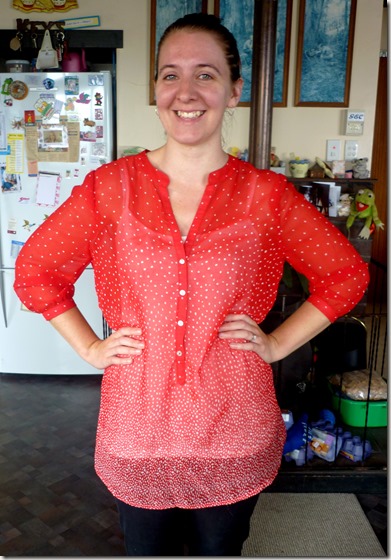
The finished product! I’m super proud of my first attempt at resizing clothing! It is still a little loose under the arms, and could have cut off a little more width from the body, but I like that its not a snug fit. As I said, its fast becoming my favourite top – I’ve worn it out for dinner over black leggings with boots, and most recently with the front tucked into my lace top jeans. Here’s how I wore it when we went to see Disney on Ice – belted over beige skinny jeans with matching red flats (‘scuse the rubbish late-night photo!):
I think I have the refashion bug now – just waiting for another chance to go to the local op shop again to see what I can find! Meanwhile, Dad has passed on a couple of old polo shirts, I’m thinking I’ll try out Merrick’s idea next…
εїз
Related articles
- 5 Ways to Refashion a Men’s Button-Up Shirt (tarapcunningham.wordpress.com)
- DIY Chevron Print Shirt and Refashioned Shorts Tutorial (sewloveable.wordpress.com)
- Refashioning Session (flossiejamieson.wordpress.com)
- T-Shirt Transformations or: How I Learned to Stop Hoarding My Old Shirts and Love DIY Tutorials (shirtkongblog.wordpress.com)
- Refashion: man’s shirt to summer top (girlandgarden.wordpress.com)
- How to wear a polo shirt (jacamoblog.co.uk)
- DIY Series: Keeping Your Shirts Up (thefashionfoot.com)
- Skirt Refashion (offsquare.wordpress.com)
- DIY Friday: Florals, Florals Everywhere (two refashions in one!) (beingzhenya.com)


Looks awesome trenes you’ve got sum awesome talent and a gud eye for recycling obviously
Thanks Nick! Yeah its been a fun learning process, I hope to get into it more next year when I can spread my things out a bit more 🙂
This shirt should be mine! just saying 🙂 Next time tell me when you need photos and I’ll get you some good ones! Good job xx
Thanks, yes I think better photos are definitely in order! If you find a similar oversize top I will happily refashion it for you 🙂 xx
This top is so pretty! Congrats on a successful first refashion!
Thanks! 🙂
That turned out really well.
Thanks! Yeah I’m pretty pleased with it 🙂
Super cool!
Thanks for linking my post up!
Xo,
Z
http://beingzhenya.com
Thanks! No worries 🙂
So cute! Great job!
http://www.buttonsandbirdcages.com
Thanks! 🙂
Pingback: Looking back on ’13 « Musical Butterfly